
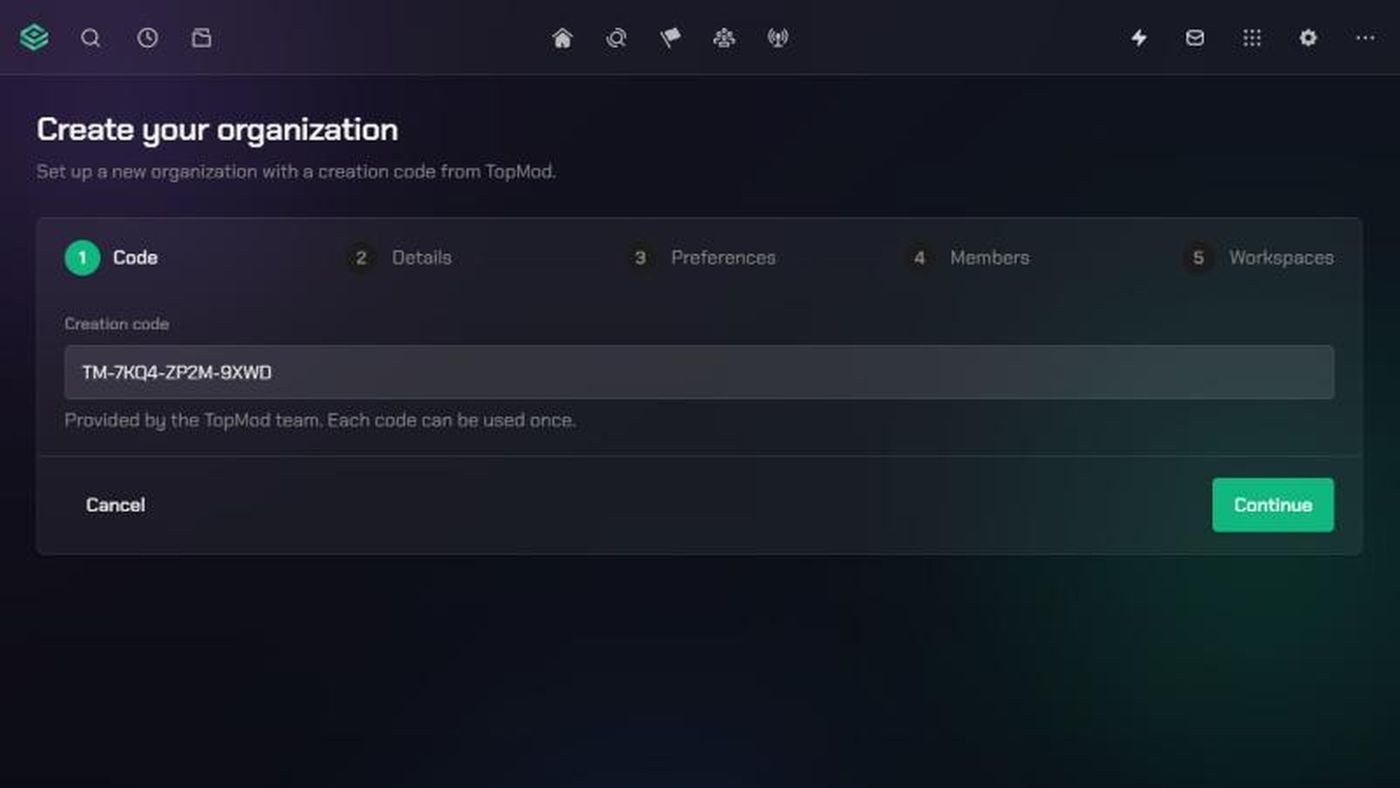
The setup wizard takes you through five screens: Code, Details, Preferences, Members and Workspaces. Everything except the organization URL can be changed afterwards.
Before you start
- You need an organization creation code. The TopMod team gives you one. It looks like
TM-XXXX-XXXX-XXXXand can be used once. It also sets how many seats and TopMod AI credits your organization starts with. - Anyone signed in to TopMod can use the wizard. You become the organization's first admin.
- Joining an existing organization? You don't need a code. Ask one of its admins to invite you instead.
- Have these ready: your organization's name, the web address you want (for example
ember-peak-games), an optional PNG or JPG icon up to 5MB, and your teammates' email addresses. - Using your own storage? Have your S3-compatible bucket's endpoint URL, region, bucket name, access key ID and secret access key to hand.
Your organization is created as soon as you leave the Details screen. If you close the wizard after that, the organization still exists. You can finish setting it up in Organization Settings.
1. Enter your creation code
- Open the wizard in one of two ways:
- If you aren't in an organization yet, TopMod shows No Organization Found. Click Create your organization.
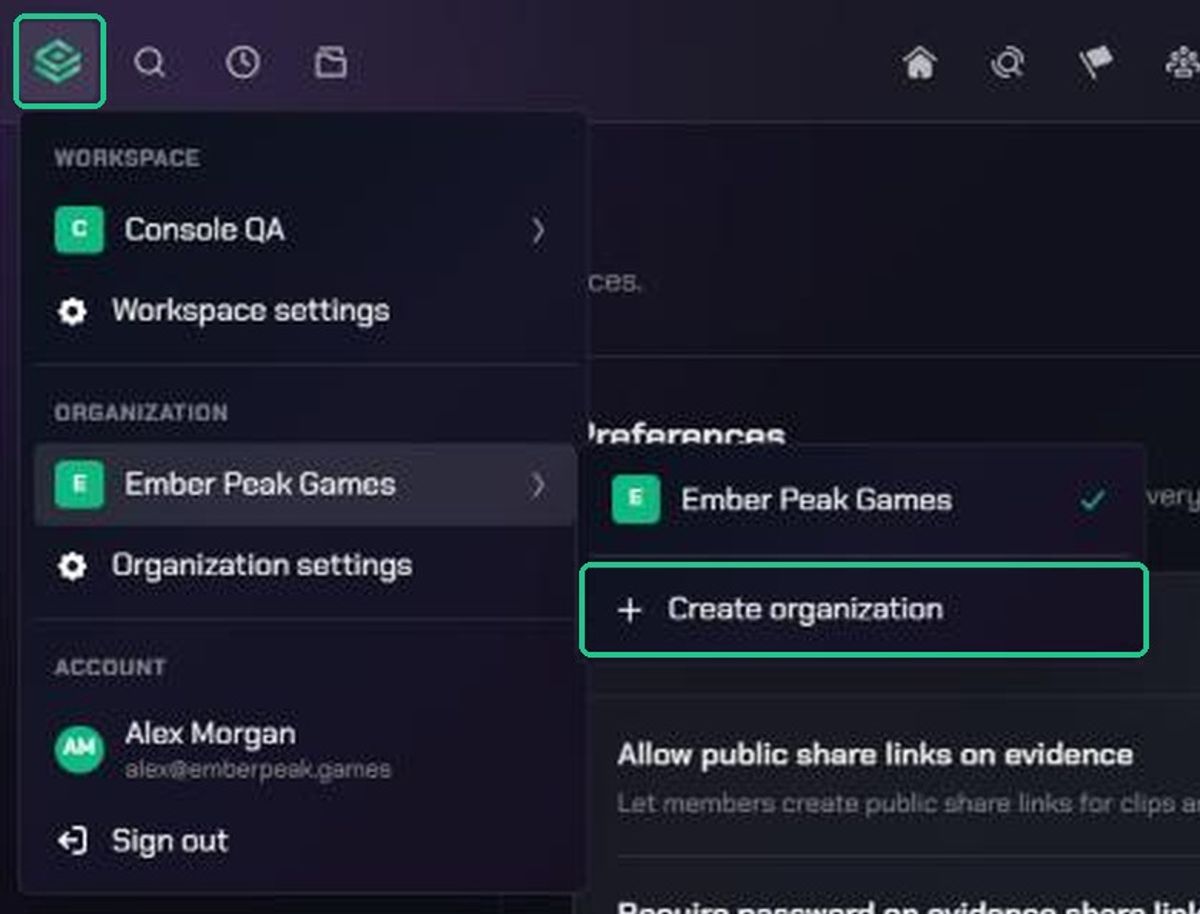
- If you're already in an organization, click the TopMod logo to open the switcher, point to your organization's name under Organization, then click Create organization.
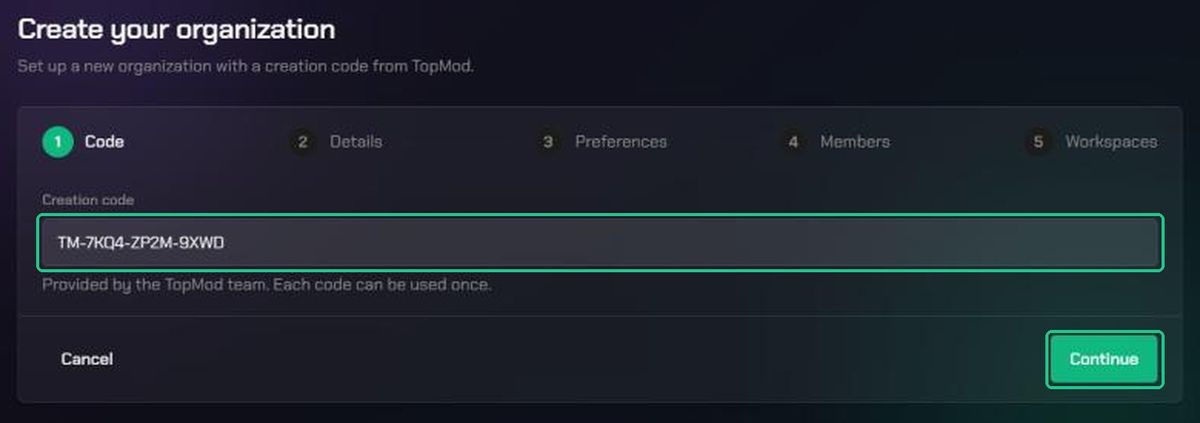
- On the Create your organization page, type your code into Creation code. Capitals are added for you.
- Click Continue, or press Enter. You'll see "Code accepted".
To leave without creating anything, click Cancel (or Back if you have no organization yet). Nothing is created at this point, and your code isn't used up.
2. Name your organization
- Type your Organization name, for example "Ember Peak Games".
- Check the Organization URL. It fills itself in from the name. To choose your own, type over it. Use lowercase letters, digits and single hyphens only.
- Optionally, click Upload icon and pick a PNG or JPG up to 5MB. To swap it, click Change icon. To remove it, click the bin icon.
- Click Continue.
Your organization is created now, and you'll see "Created your organization name". It appears in the organization switcher straight away.
Choose the URL carefully. You can change the name and icon later in Organization Settings, but changing the URL needs TopMod support.
3. Choose your preferences
These are organization-wide defaults that apply across every workspace. Answer each question with Yes or No.
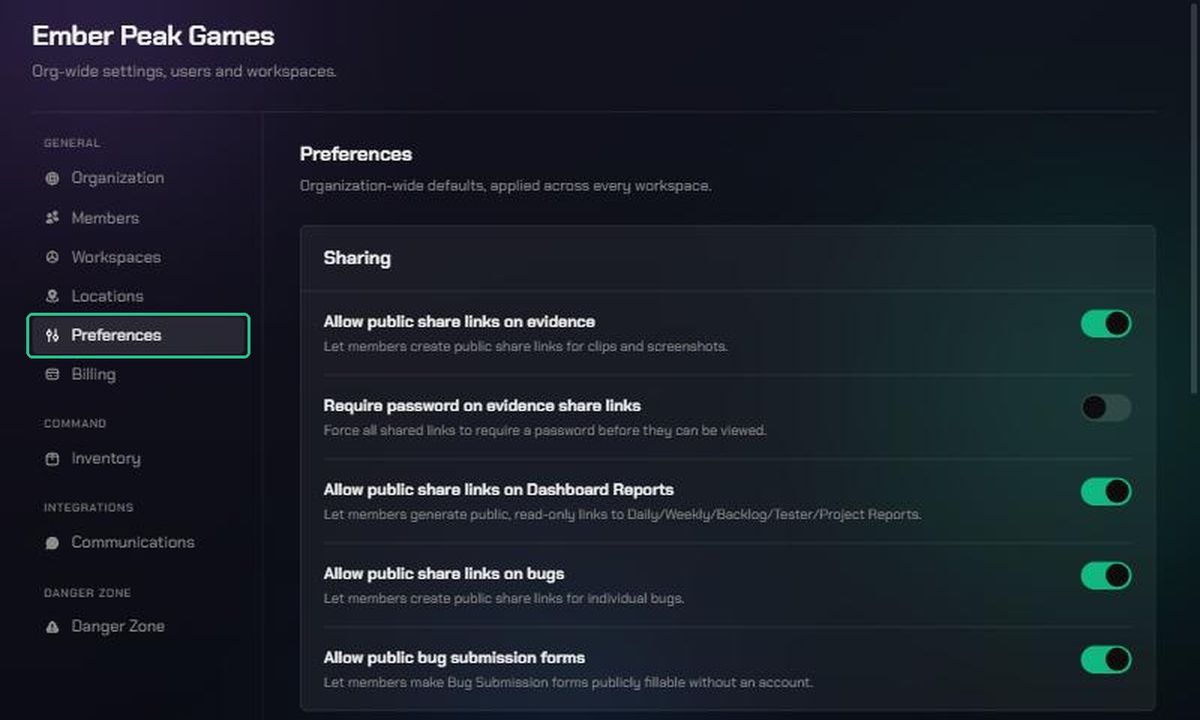
- "Do you want team members to be able to generate public share links?" Public links let people outside your organization view what you share. If you answer Yes, click Choose what can be shared to switch each item on or off:
- Evidence: public links on clips and screenshots. Turn on Require a password on evidence links to protect every evidence link with a password.
- Dashboard Reports: read-only links to the Daily, Weekly, Backlog, Tester and Project Reports.
- Bugs: public links on individual bugs.
- Bug submission forms: forms people can fill in without a TopMod account.
- "Do you want to use your own storage for your test recordings?" Answer No to keep recordings in TopMod Storage, with nothing to set up. Answer Yes to use your own S3-compatible bucket, then fill in Endpoint URL, Region, Bucket name, Access key ID and Secret access key. Use your bucket's own endpoint (with the bucket name in the address), starting with
https://. - "Do you want to have TopMod AI enabled across all workspaces by default?" Answering Yes turns on all three features. Click Choose which AI features are on to pick:
- AI bug generation: drafts a bug report from a recorded clip.
- AI assisted writing: improves a bug's title, description and fields while it's being written.
- AI reviewer: checks new bug submissions for missing detail before a human reviewer sees them.
- Click Continue. You'll see "Preferences saved".
If you chose your own storage, TopMod tests the connection and sets up your bucket's CORS policy when you click Continue. If the test fails, you'll see why. Correct the details or switch back to No, then try again.
TopMod AI also needs available AI credits to run. Your creation code includes your starting credits.
4. Invite your team
Each person you invite needs a free seat. The line above the form shows how many you have left, for example "2 of 9 free seats used by invitations (your own seat is already taken)".
- Under Invite teammates, type the Email addresses of the people to invite. Separate them with commas or new lines.
- Click Invite. Invitations are emailed straight away, and each person appears in the list below.
- To make someone an organization admin, tick Organization admin next to their address. Everyone else joins as a member.
- To cancel an invitation, click the bin icon next to it.
- Click Continue. You can skip this step and invite people later.
Invitations last 7 days. You'll choose which workspaces people join on the next screen.
5. Set up your first workspace and finish
Workspaces are where work happens in TopMod. Every project, bug and test session lives inside one. Use a workspace for a team, a game or a group of related projects. You need at least one to finish.
- Click Add workspace. The Create workspace window opens over the page.
- Work through its screens, clicking Continue on each:
- Details: the Workspace name, an optional Description, its Slug (web address), an optional icon and, if your organization has locations, a Location.
- Members: tick the people who should join, then choose whether each is a Workspace admin and their Team role. People you've just invited are listed too, and join when they accept. You can skip this.
- Preferences: defaults for this workspace. Anything your organization turned off on the third screen stays off here.
- Connections: optionally connect Jira, Slack or Discord. Each one opens its own sign-in page.
- Backlog: a backlog is where the workspace's bugs live. One is created for you. Add more if you track bugs separately by game area, platform or team.
- Click Finish. The workspace now appears in the list.
- To add more, click Add another workspace. To rename one, click the pencil icon (Edit workspace). To remove one, click the bin icon (Delete workspace), then Delete workspace to confirm.
- Click Finish at the bottom of the page.
TopMod opens your organization's HQ and shows "your organization name is ready", with your workspaces and how many invitations were sent. Click Get started.
Change your organization's settings later
Only organization admins can open Organization Settings. If you're a member, ask an admin to make the change.
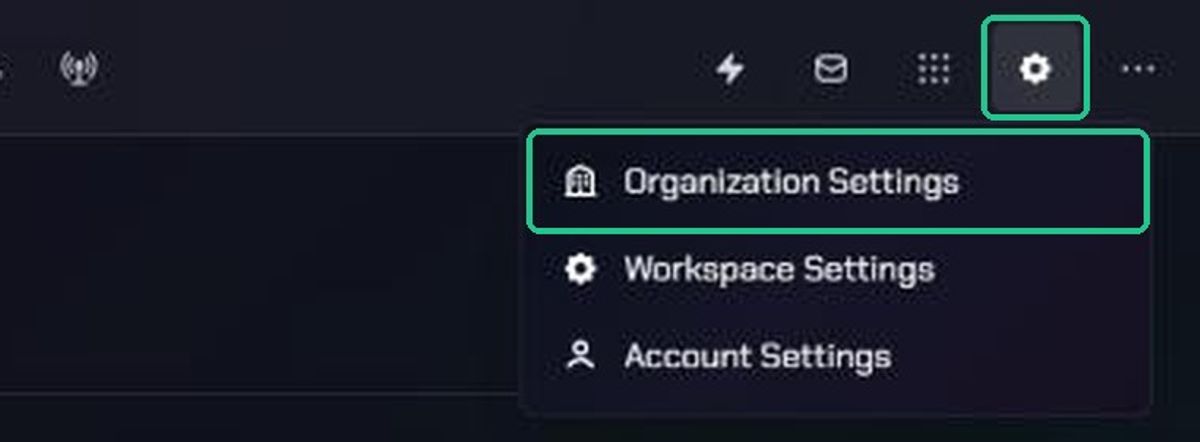
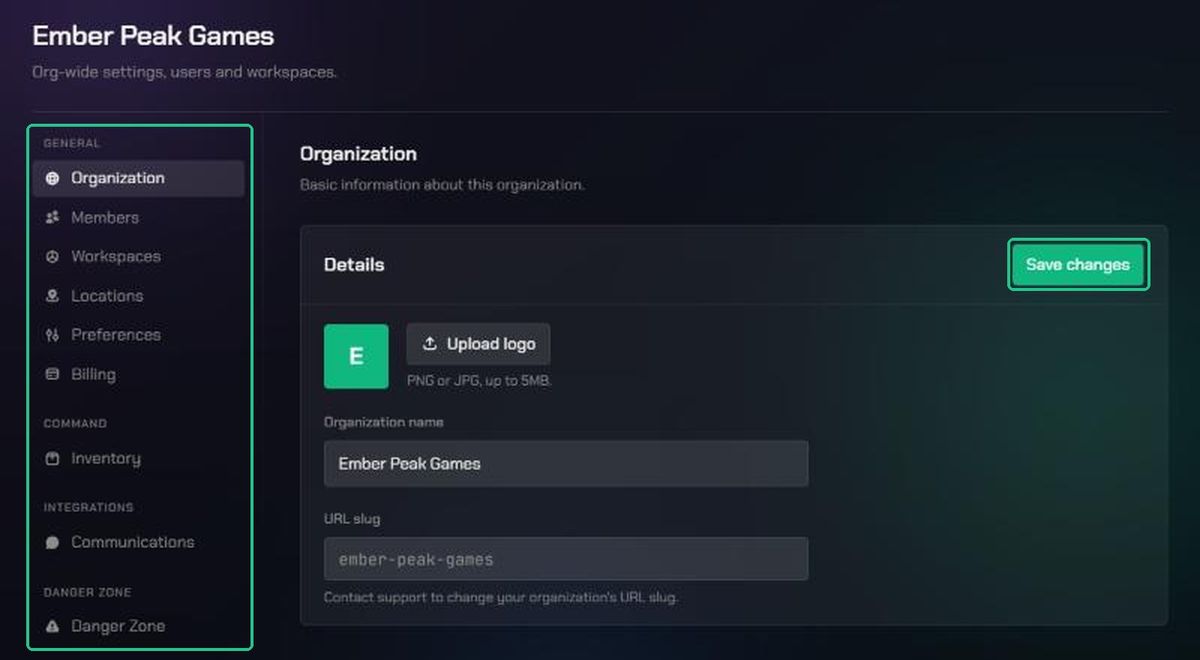
- Click Settings (the gear icon), then Organization Settings.
- Pick a page from the settings menu:
- Organization: change the Organization name and logo, then click Save changes. The URL slug is shown but can only be changed by TopMod support.
- Members: invite people, change roles and manage pending invitations.
- Workspaces: see every workspace in a list or board view, with its status and delivery.
- Locations: add offices, teams or other locations that workspaces can be assigned to.
- Preferences: change the Sharing, TopMod AI and Storage defaults you chose in the wizard. Each switch saves as soon as you change it.
- Billing: see your Seats, TopMod AI Credits and recent transactions.
- Inventory (under Command): keep a catalog of your test hardware.
- Communications (under Integrations): connect a default Slack workspace or Discord server for every workspace.
- Danger Zone: deactivate the organization.
Deactivating stops everyone, including you, from accessing the organization, and sets its active projects to complete. Nothing is deleted, but only TopMod support can reactivate it.
Troubleshooting
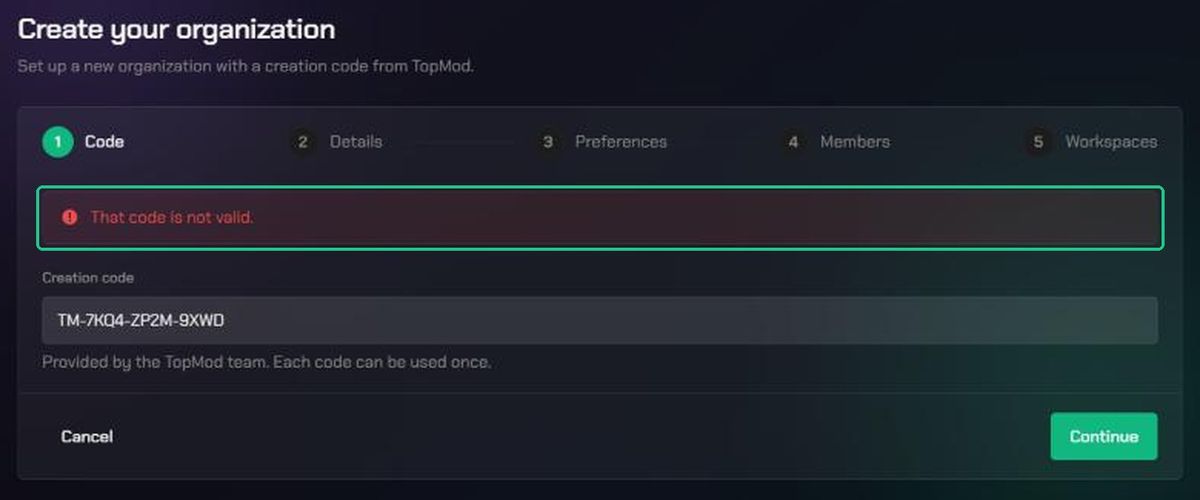
- "That code is not valid.": check you've typed the whole code. Codes can only be used once and some expire. If it still fails, ask the TopMod team for a new one.
- "The URL is already taken — choose another.": another organization uses that address. Type a different Organization URL.
- "Use lowercase letters, digits and single hyphens.": remove spaces, capitals and symbols from the URL, and don't start or end it with a hyphen.
- "Please choose a PNG or JPG image." or "Image must be 5MB or smaller.": pick a PNG or JPG under 5MB, or skip the icon and add it later.
- "Your organization was created, but its icon couldn't be uploaded": your organization is fine. Add the logo later on the Organization page of Organization Settings.
- "The endpoint must start with https://": enter your bucket's full
https://address. - An error when you continue from Preferences with your own storage: the connection test failed. Check the endpoint, region, bucket name and keys, or answer No to use TopMod Storage.
- "Your seats are all allocated — remove someone first.": cancel an invitation, or contact TopMod to add seats.
- "You're already in the organization as its first admin.": remove your own address from the list. You already have a seat.
- "These don't look like email addresses": fix the addresses shown, then click Invite again.
- "The invitation was created but the email didn't send": resend it from Organization Settings > Members.
- Finish is greyed out on the last step: add at least one workspace.
- You can't go back to the Code or Details screen: your organization has already been created. Change its name or logo in Organization Settings instead.