
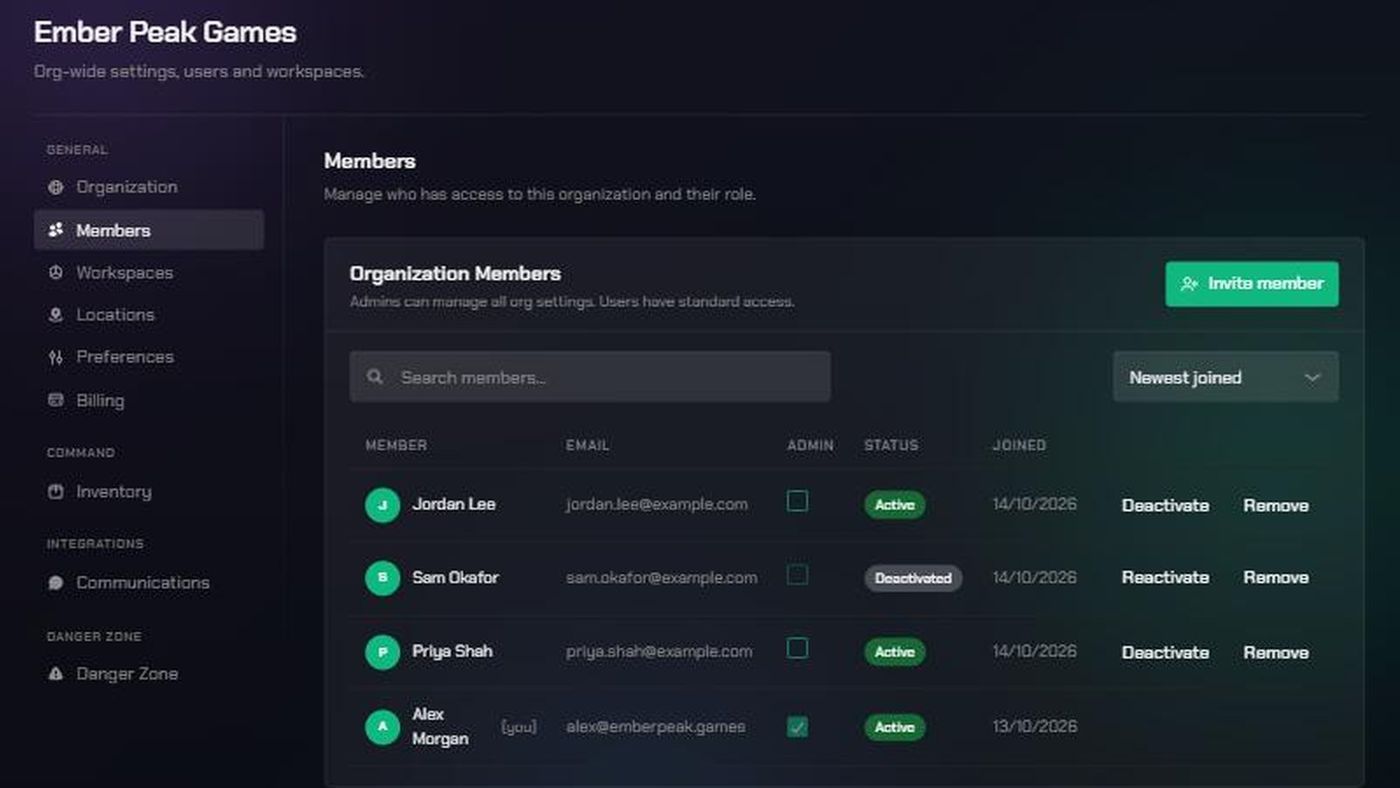
Before you start
- You need to be an organization admin. Only admins can open Organization Settings. If you're not an admin, ask one of your organization's admins to make the change for you.
- You can't change your own access. You can't untick your own Admin box, deactivate yourself, or remove yourself. Another admin has to do it.
- Seats matter. Deactivating or removing someone frees their seat. Reactivating someone takes a seat back, so you need at least one open seat.
- Changes only affect this organization. If the person belongs to other organizations, their access there stays the same.
To invite someone new, see Invite team members to your organization.
1. Open the Members page
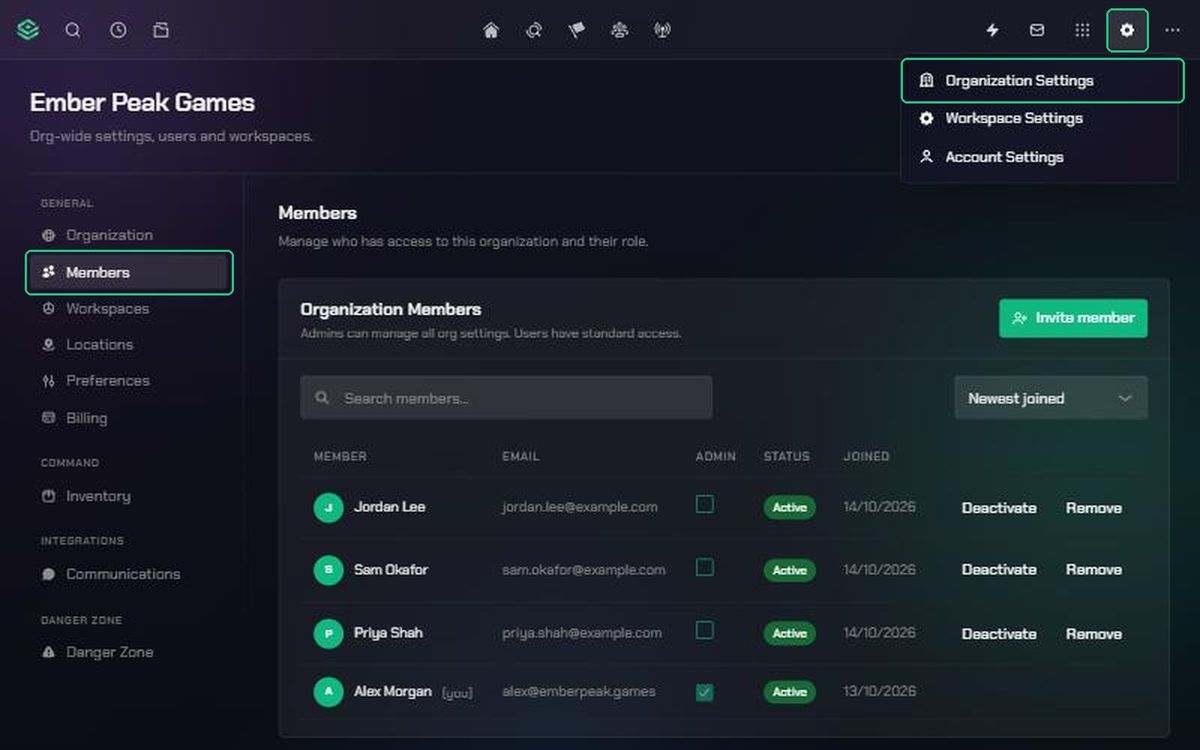
- Click Settings (the gear icon) in the navigation.
- Choose Organization Settings.
- Click Members.
You'll see the Organization Members list. Each row shows the person's name, Email, an Admin checkbox, their Status and the date they Joined.
2. Find the member
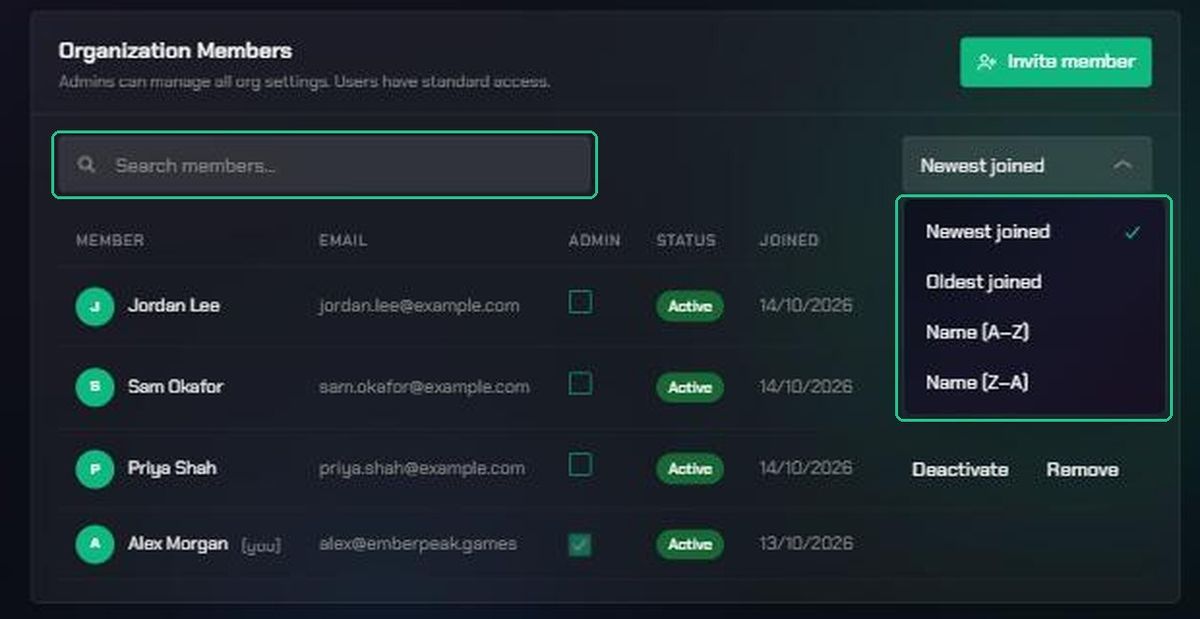
- Type a name or email address in Search members….
- To change the order, open the sort menu and choose Newest joined, Oldest joined, Name (A–Z) or Name (Z–A).
- If your organization has more than 10 members, use the page controls under the list.
3. Change a member's role
An organization has two roles. Admins can manage all organization settings. Members have standard access.
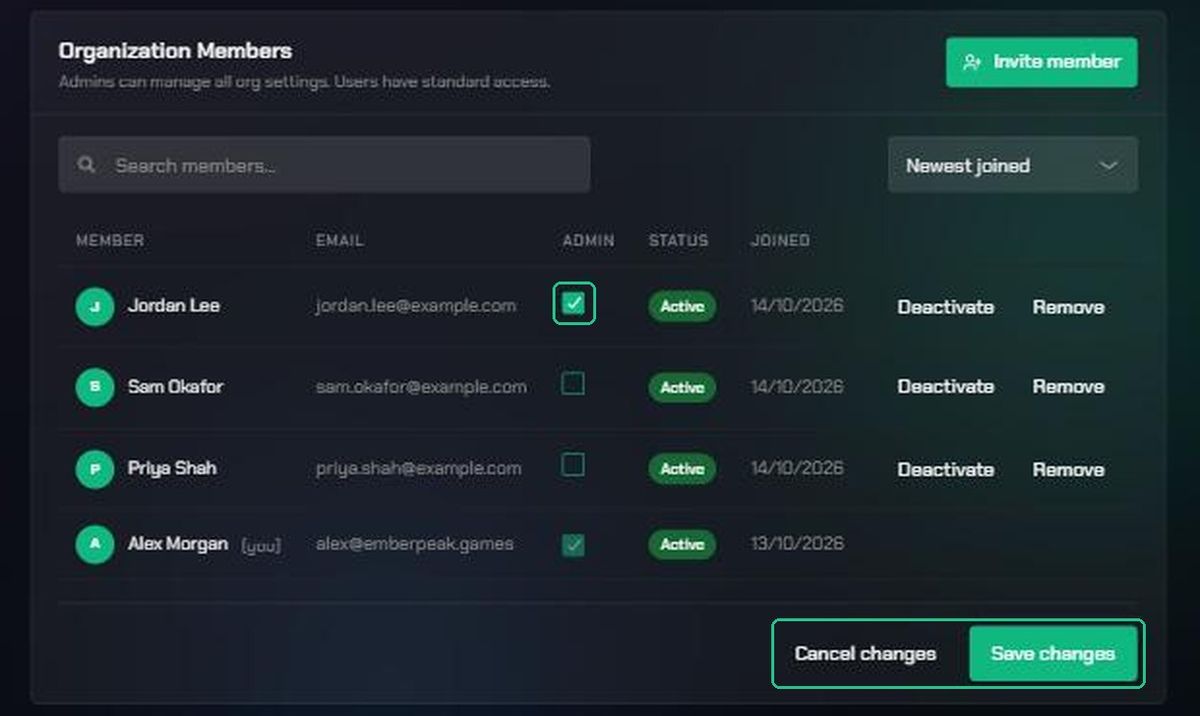
- Tick the Admin box to make someone an admin, or untick it to make them a member.
- Repeat for anyone else you want to change. Nothing is saved yet.
- Click Save changes at the bottom of the list. To undo everything instead, click Cancel changes.
You'll see "Saved 1 role change" (or the number you changed).
When you make someone an organization admin, they also become an admin of every workspace in the organization. If you later make them a member again, they stay a workspace admin. To change that, update their role in each workspace's Workspace Settings.
4. Deactivate a member
Deactivate someone when they no longer need access but might come back, for example a contractor between projects.
- Find the member and click Deactivate on their row.
- Read the message in the confirmation window, then click Deactivate.
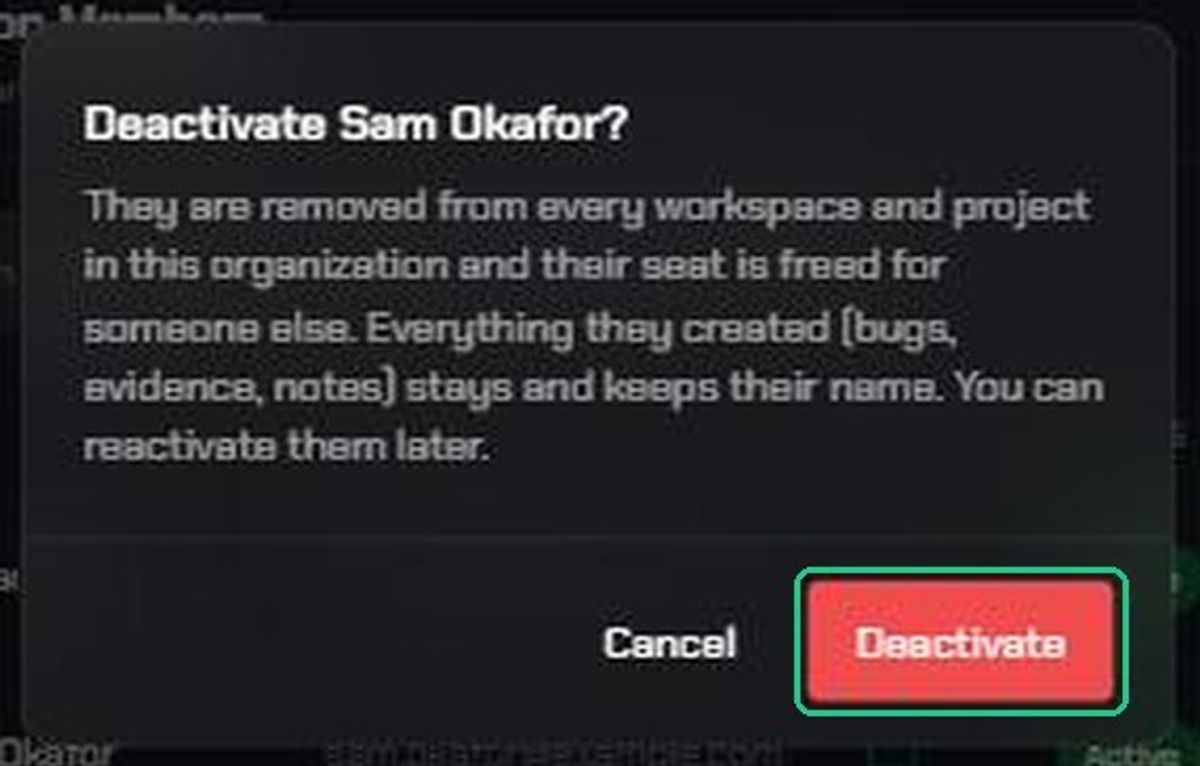
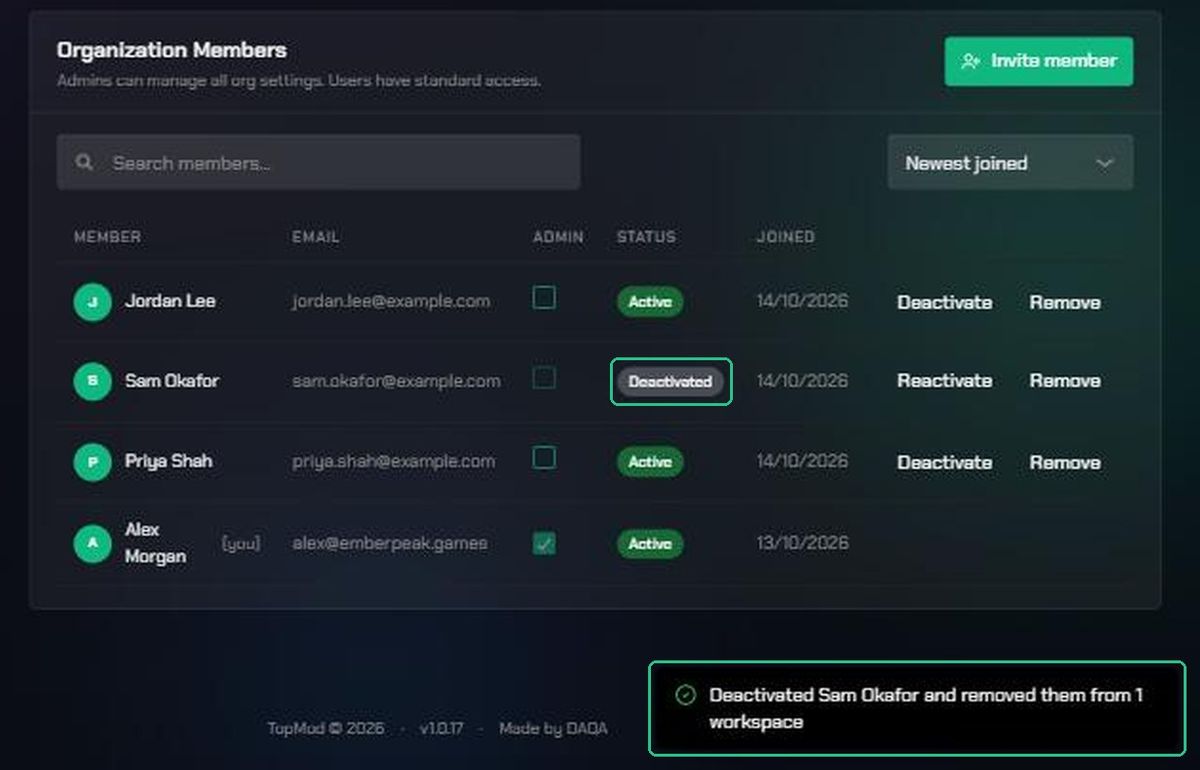
You'll see "Deactivated [name] and removed them from [number] workspaces". Their Status changes to Deactivated.
What happens:
- They lose access to the organization straight away.
- They're removed from every workspace and project in the organization.
- Their seat is freed for someone else.
- Everything they created (bugs, evidence, notes) stays and keeps their name.
5. Reactivate a member
- Find the deactivated member and click Reactivate on their row.
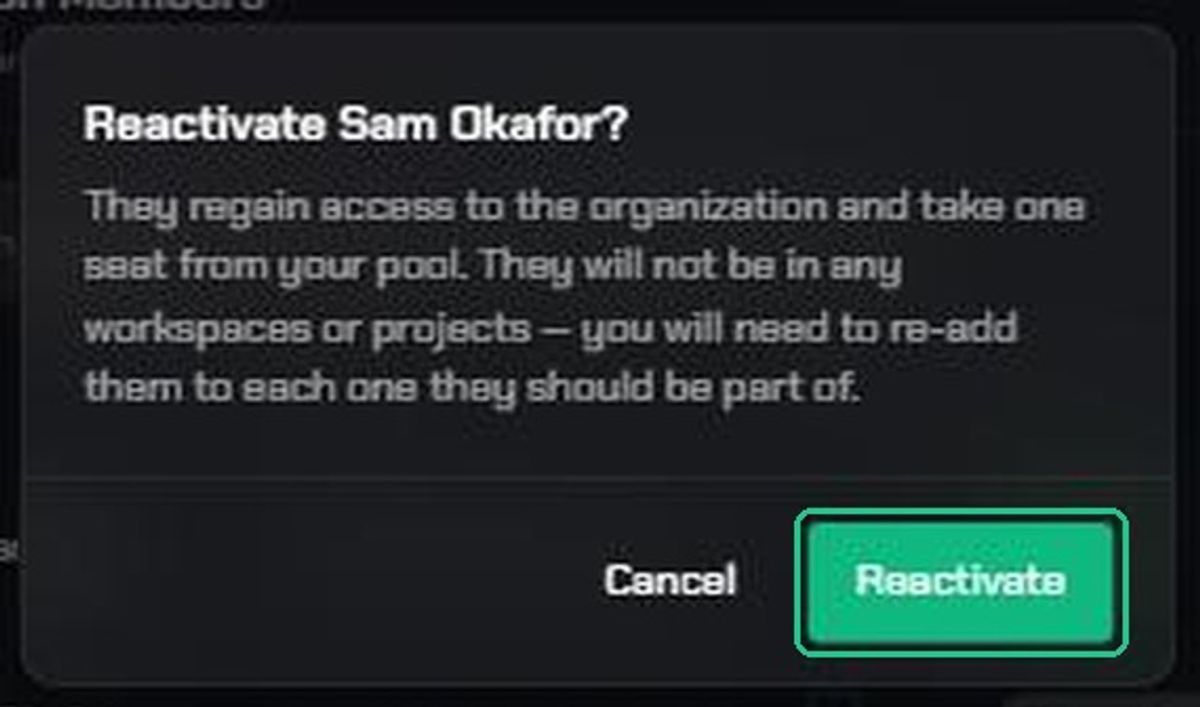
- Click Reactivate in the confirmation window.
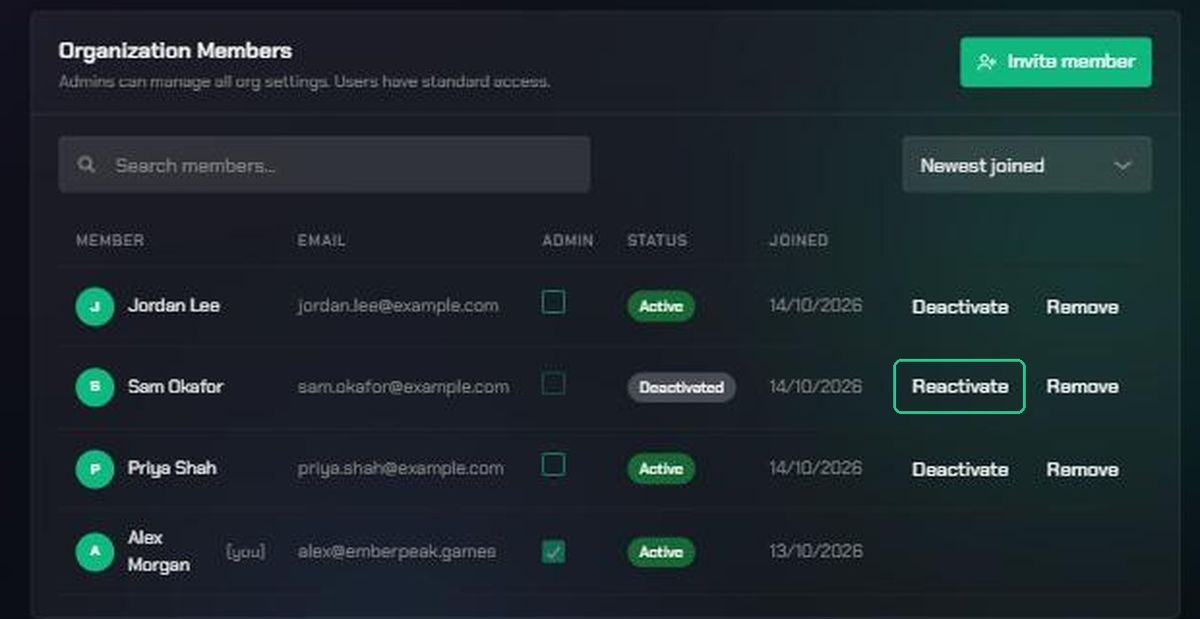
You'll see "Reactivated [name] — re-add them to their workspaces and projects". Their Status changes back to Active and they take one seat.
Reactivating gives back access to the organization only. They won't be in any workspaces or projects. Add them back to each one they need from Workspace Settings and the project's team.
If Reactivate is greyed out, you have no open seats. Free a seat or contact support to add more.
6. Remove a member permanently
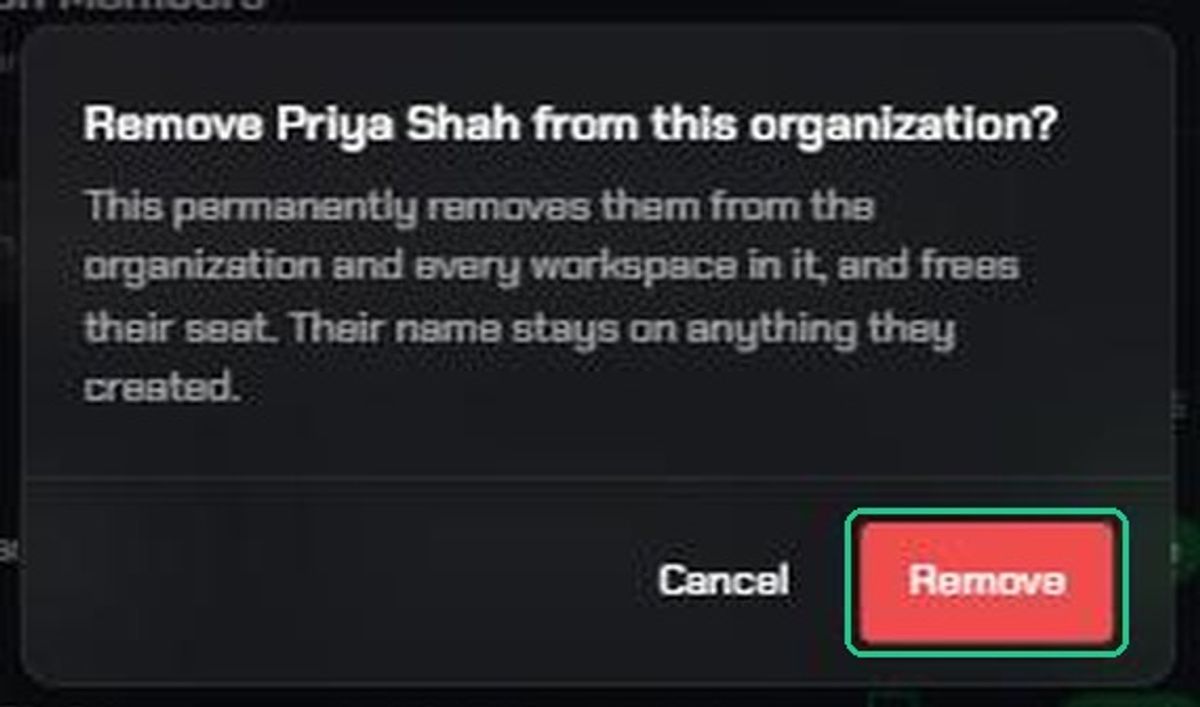
Removing someone can't be undone. If they might need access again, deactivate them instead.
- Find the member and click Remove on their row.
- Click Remove in the confirmation window.
You'll see "Removed [name]" and they disappear from the list.
What happens:
- They're removed from the organization and every workspace and project in it.
- Their seat is freed.
- Their name stays on anything they created.
- To give them access again, you'll need to send a new invitation.
Deactivate or remove: which to choose
- Both end access straight away, remove the person from every workspace and project, free their seat, and keep their work with their name on it.
- Deactivate keeps them in your member list as Deactivated, and you can undo it with Reactivate.
- Remove takes them off the list for good. To bring them back, send a new invitation.
If you're not sure, deactivate. You can always remove them later.
What the other person sees
TopMod doesn't send an email for any of these changes, so let the person know yourself.
- Made an admin: Organization Settings appears in their Settings menu.
- Deactivated: the organization disappears from their organization switcher. If it was their only organization, they see "Your access has been deactivated" and are asked to contact an admin.
- Removed: the organization disappears from their organization switcher. If it was their only organization, they see "No Organization Found".
- Reactivated: the organization comes back after they refresh, but they won't see any workspaces until you add them back to one.
Troubleshooting
- You can't find Organization Settings in the Settings menu. You're not an organization admin. Ask an admin to make the change, or to make you an admin.
- Your own Admin box is greyed out ("You cannot change your own role."). Ask another admin to change your role. There's no Deactivate or Remove button on your own row for the same reason.
- Reactivate is greyed out, or you see "This organization has no available seats — free one up or purchase more before reactivating." Deactivate or remove someone who no longer needs access, or contact support to add seats.
- "Cannot deactivate the last active organization admin." Make someone else an admin first, then try again.
- "Could not save 1 role change". The boxes that failed still differ from the saved role. Refresh the page and try again. If it keeps failing, contact support.
- Someone you made a member can still manage a workspace. They're still a workspace admin. Change their role in that workspace's Workspace Settings.
- A reactivated member says they can't see anything. Reactivating doesn't add people back to workspaces or projects. Add them to each one they need.