
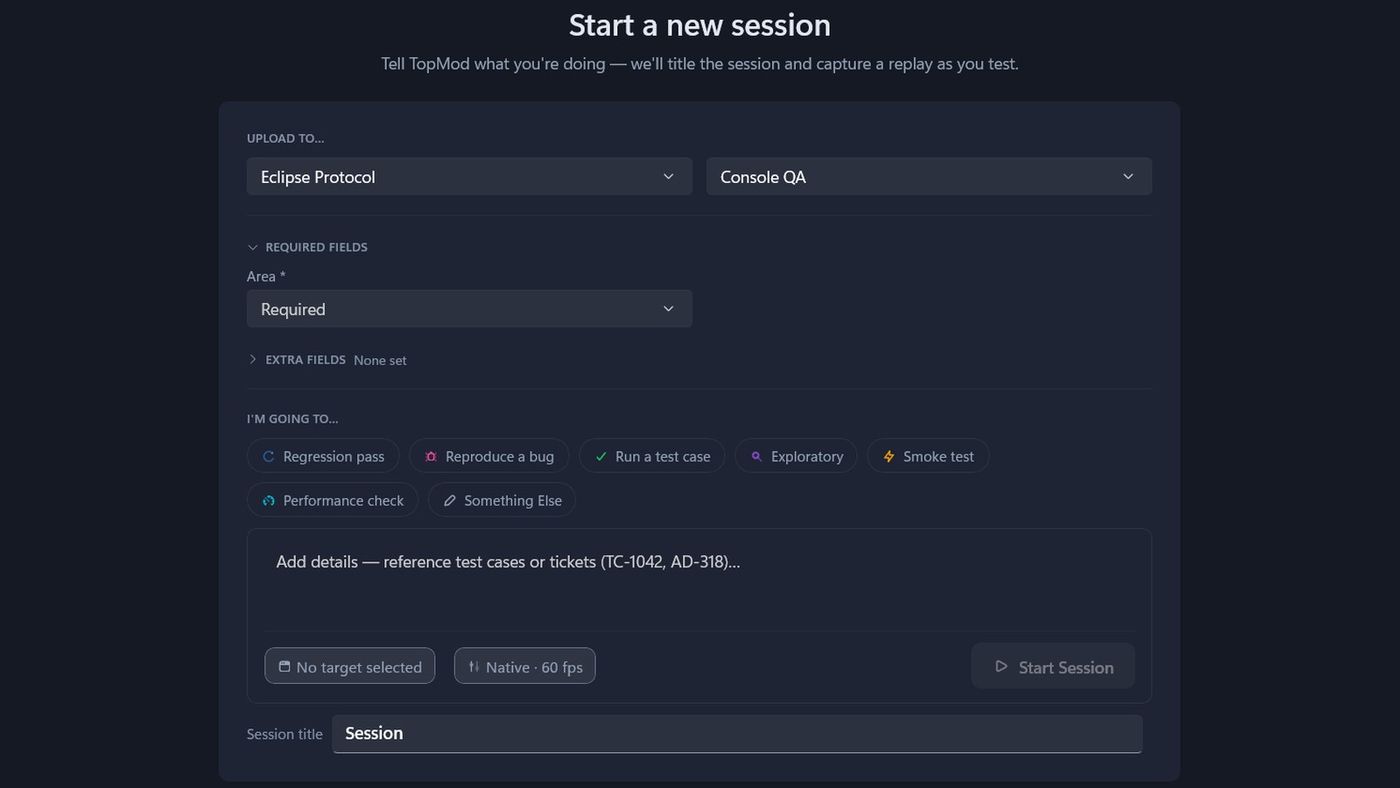
Before you start
- Capture fields are details your team wants for every recording, such as the Area you're testing, the Branch or the Changelist. An admin chooses them for each project in TopMod (see Capture Fields in the Checkpoint guides). If your project has none, you won't see them.
- The values are saved with the session's timeline. In TopMod, the replay, each clip and each screenshot shows which values applied at that moment.
- You need TopMod Capture 1.2.10 or later, signed in. If you go offline, Capture keeps using the last fields it knew.
1. Choose the project
Capture fields belong to the project the session uploads to. Pick it in the project switcher at the top of the sidebar, or in the UPLOAD TO… boxes on the home screen. See Recording Sessions. The fields update straight away when you switch project.
2. Fill in the fields
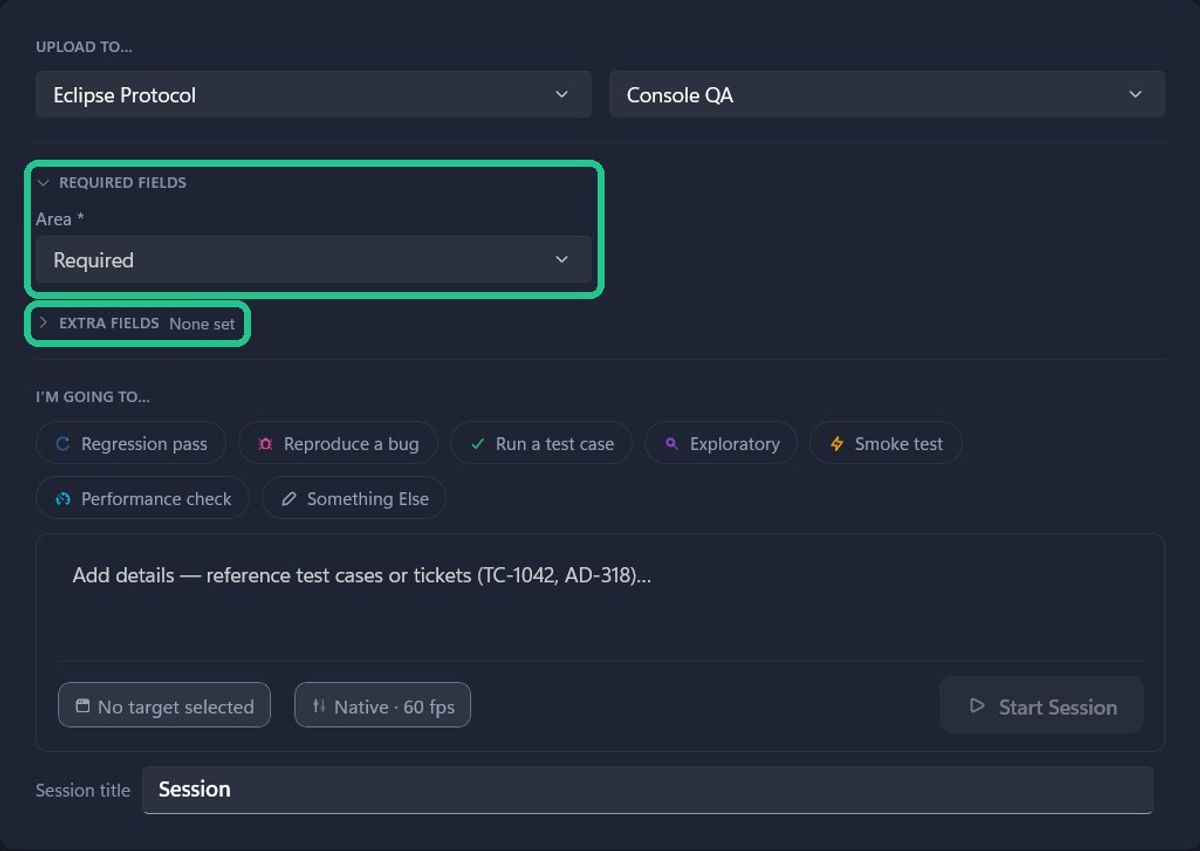
The fields are on the Start a new session card, in two groups:
- REQUIRED FIELDS: every one needs a value before you can start recording. Each has a * after its name.
- EXTRA FIELDS: fill these in if you can.
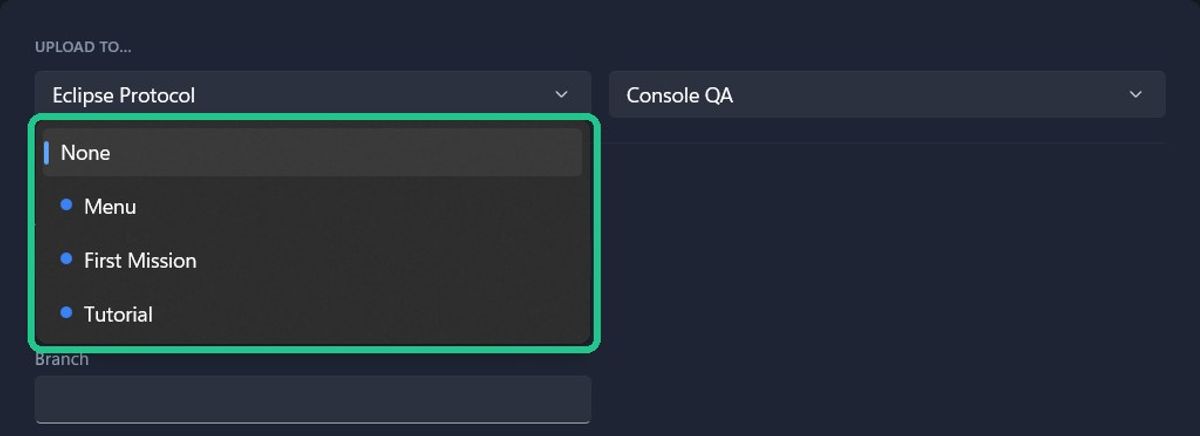
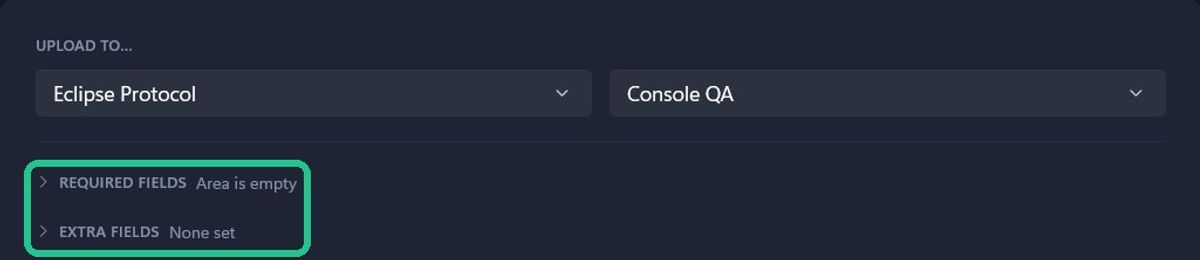
Fields with a list of values are dropdowns; pick None to clear one. Text and number fields are boxes you type in. To save space, click a group's heading to collapse it. A collapsed group shows a one-line summary, such as "Area: Castle, Branch: main", "Area is empty" or "None set".
3. Let Capture remember them
Capture remembers your values for each project. Your next session starts with them, however you start it: from the card, with Alt+R, from the tray or with Auto-record. Fields you've never filled in start with the default your admin set, if there is one. Only change what's different this time.
4. Start recording
Click Start Session as usual. If things change while you play, such as moving to a new area, update the fields as you go. See Fields While Recording. You can also fix them before uploading. See Fields in Review.
Auto-record isn't held up by an empty required field, so it never misses a game launch. Instead, Capture warns you when you upload.
If a required field is empty when you start, Capture doesn't record and names the field in a message at the top of the window.

Troubleshooting
- You see "Fill in Area before you start recording." at the top of the window. Fill in the fields it names under REQUIRED FIELDS, then start again. This also applies when you start with Alt+R or from the tray.
- There are no capture fields on the card. Your project doesn't use them, or you're on a version of Capture before 1.2.10. Check the project in the sidebar switcher.
- The value you need isn't in a dropdown. Ask an admin to add it to the field in TopMod. Capture picks it up within about 15 seconds.
- A field shows last session's value, not the default. Your remembered values come first. Change the field if it's different this time.